Every year I make a couple of new ornaments. Over the years I have built an impressive collection of handmade pieces. I have found that if you make seven of the same ornament, there are enough of them to mingle well and be part of the story without taking over the show. My philosophy is, you don’t want too many one-off ornaments so that the tree looks cluttered but you also want to avoid having the tree look like a fixture in a department store. I’ll expound on this tree trimming design philosophy in a future post. Not to worry!
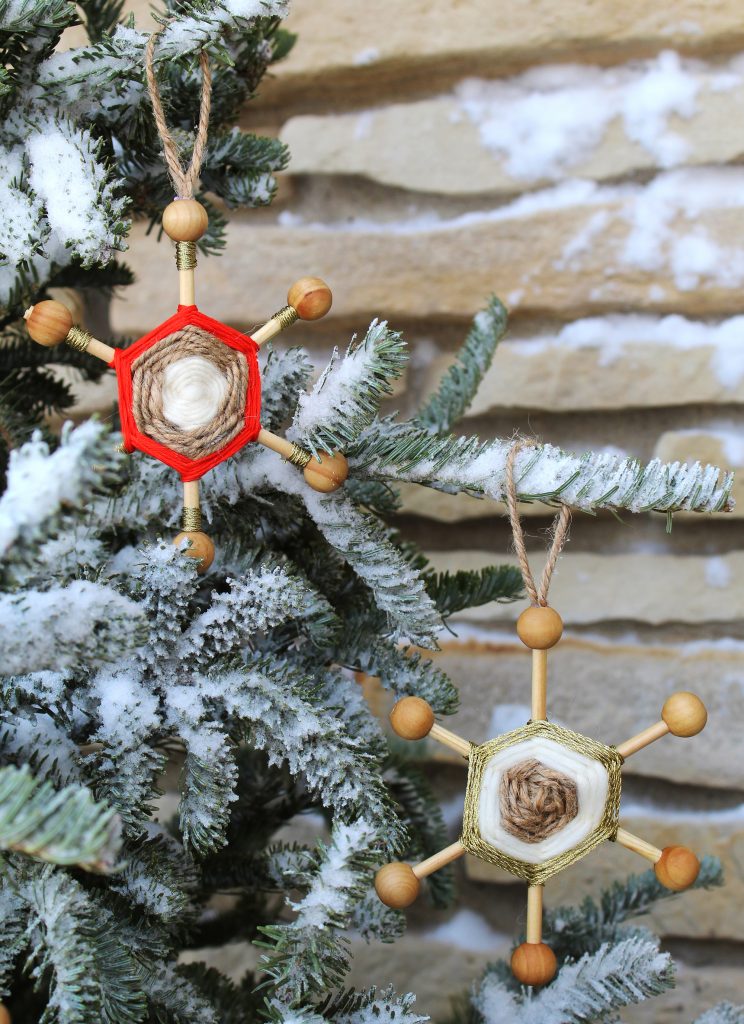
This design was inspired by the wrapped “gods eye” ornaments that have resurfaced as of late. A perfect addition to any Scandinavian inspired theme. I wanted to create something that added elements of honey color wood, rich woolen yarns and a hint of shine. These are fairly simple to construct and look expensive once completed. If you make the bases ahead of time, the yarn wrapping can be a fun way to spend time with some of your less crafty friends and family.
* This post contains affiliate links to products I use and trust. This means when you purchase using my link below I may receive a commission at no extra cost to you.
Small hand saw to cut wood dowel and create notches so stacks lay flat.
Olive oil or grape seed oil.
Hot glue gun and hot glue sticks.
Scissors
1Cut three pieces from the larger dowel approximately 5 inches in length.
2Mark the pieces in the center with a pencil. Here is where you will carefully cut a small V shaped notch in each 5” dowel piece. Be carefully to not cut through the entire dowel. This will take some finesse but will help the ornaments lay flatter making them easier to wrap.
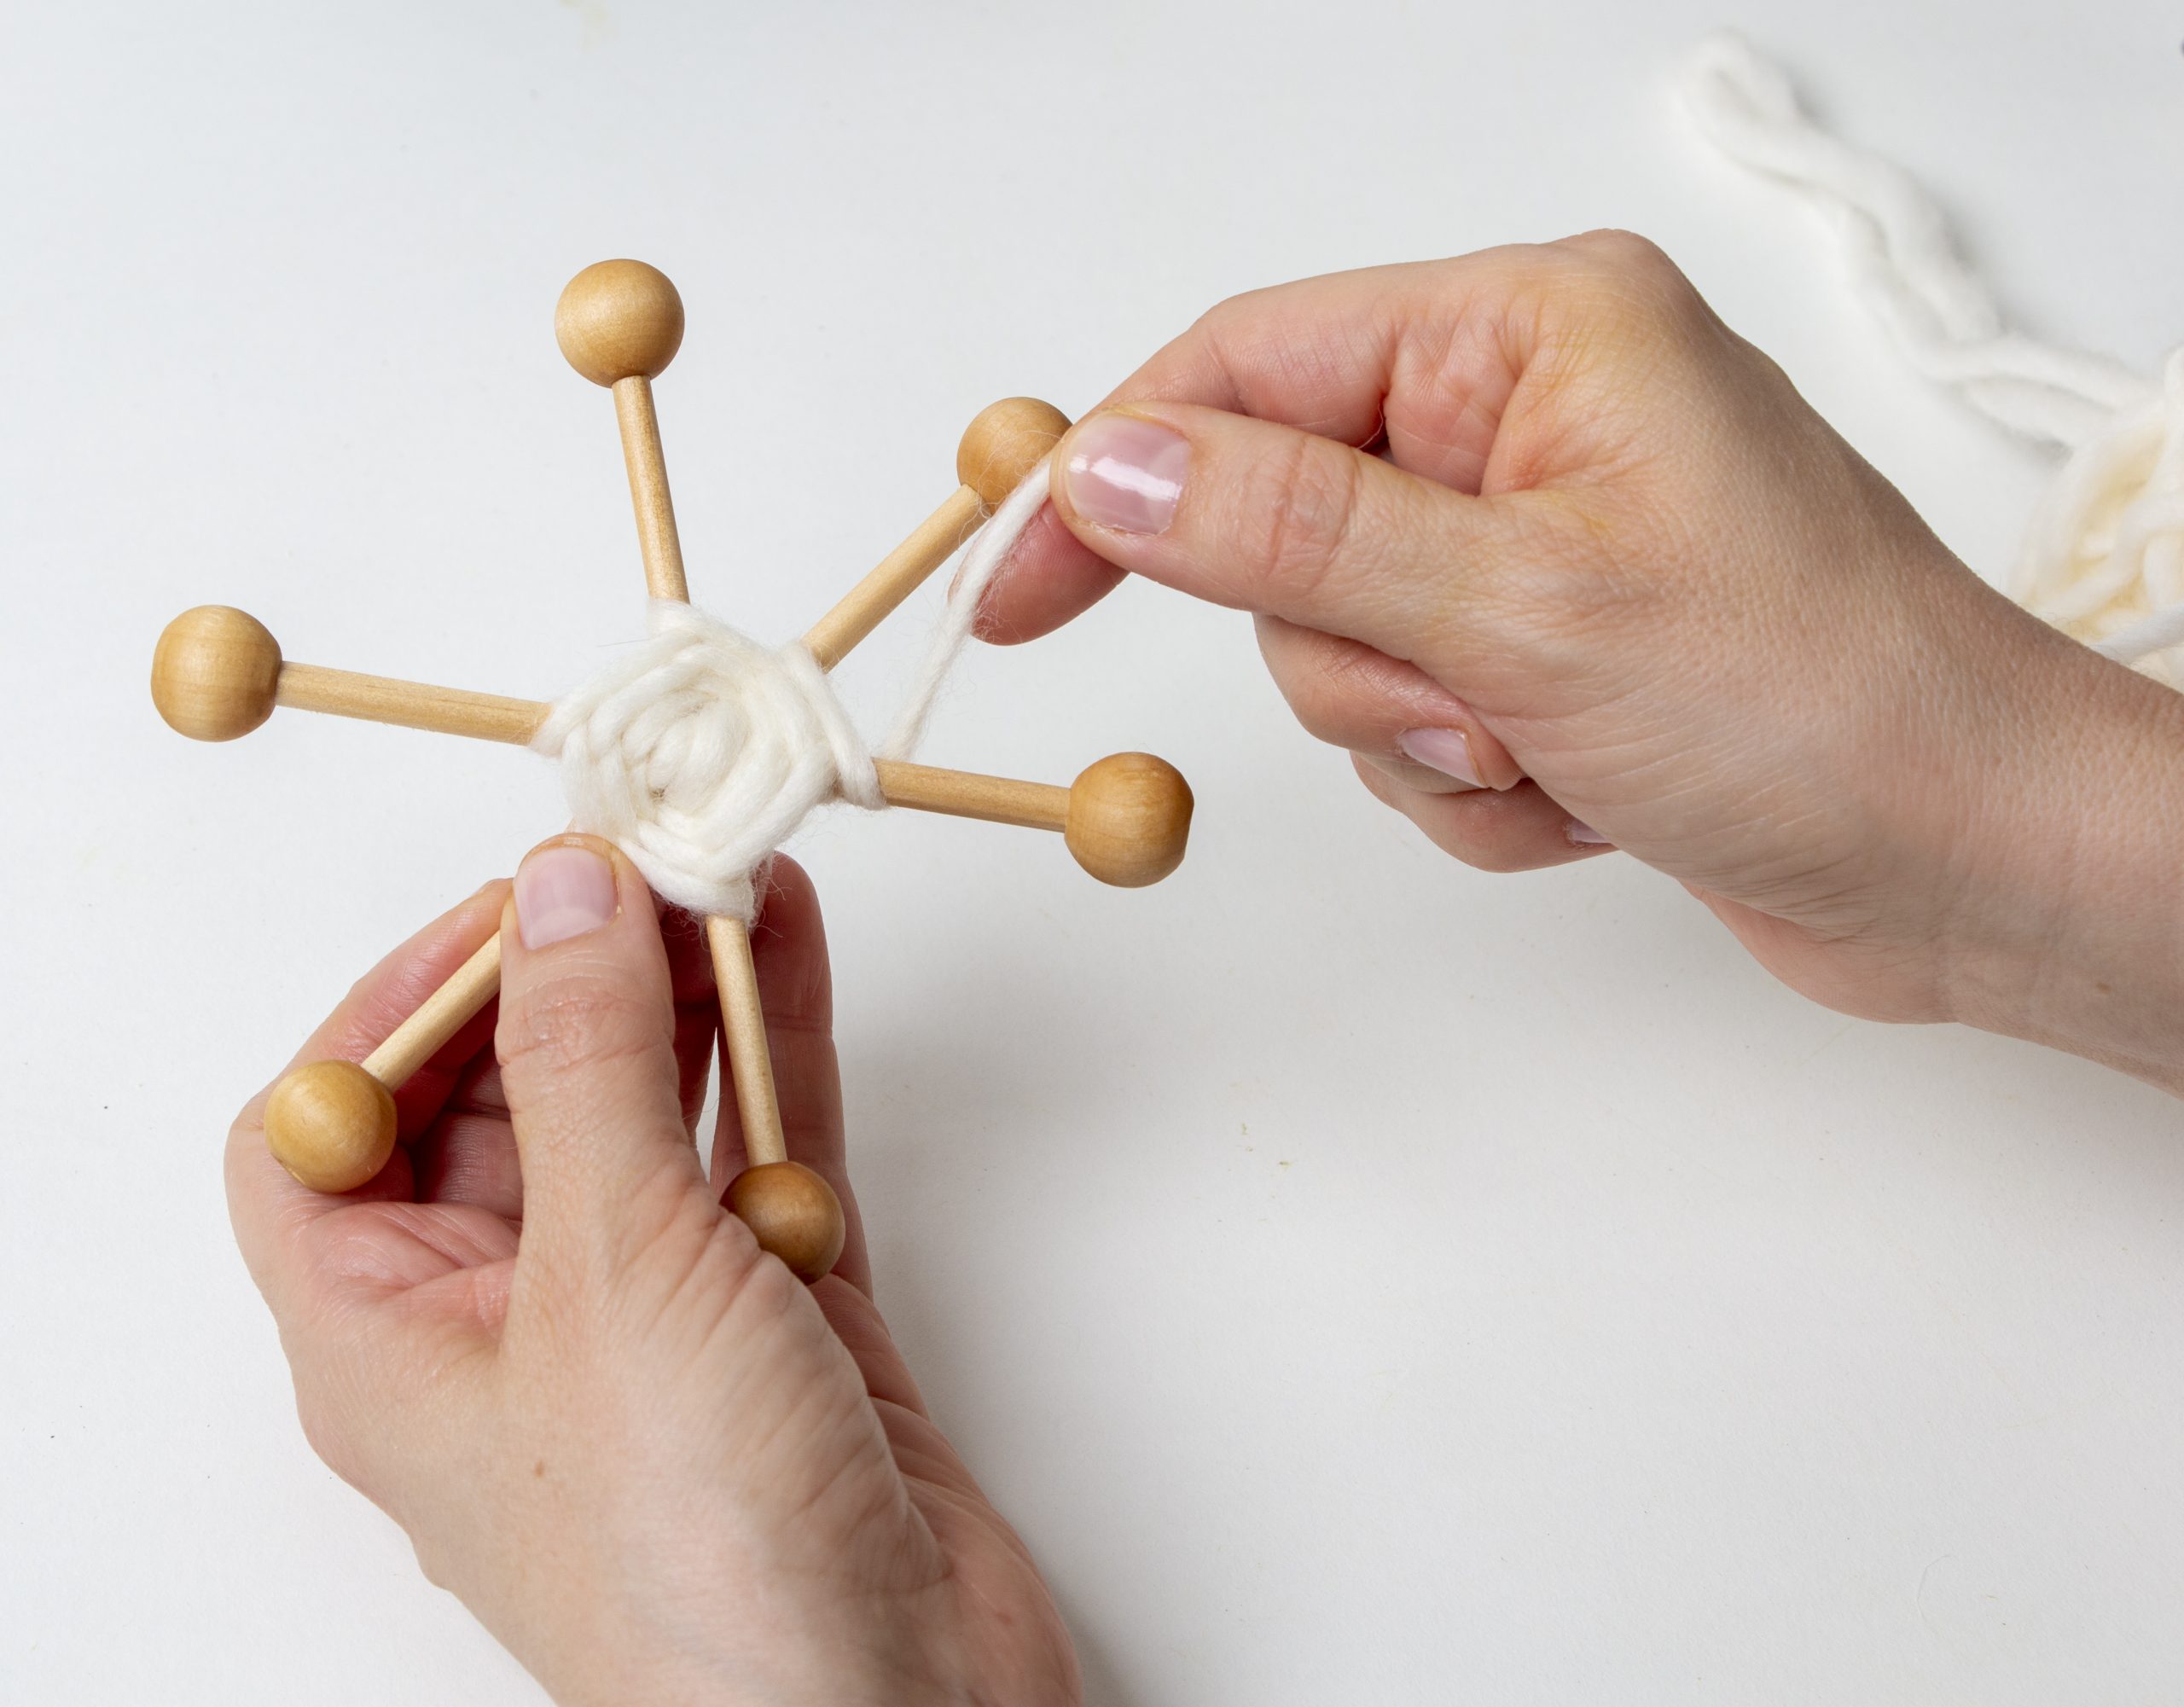
3 Stack the dowels in a star shape, evenly spacing out the distance between each dowel. Where V shape notches meet in the center, apply a generous amount of hot glue. Don’t worry if this is messy. It will be covered with the yarns. Allow to cool.
4Insert dowel ends into the opening in the wooden beads on all 6 ends. Be careful with the amount of force used. Twist bead into position if you find it is not attaching easily.
5Once you have the wood form completed. Rub olive oil over the wood and allow to soak in for about 5 minutes to give the wood a warmer color and a more finished look.
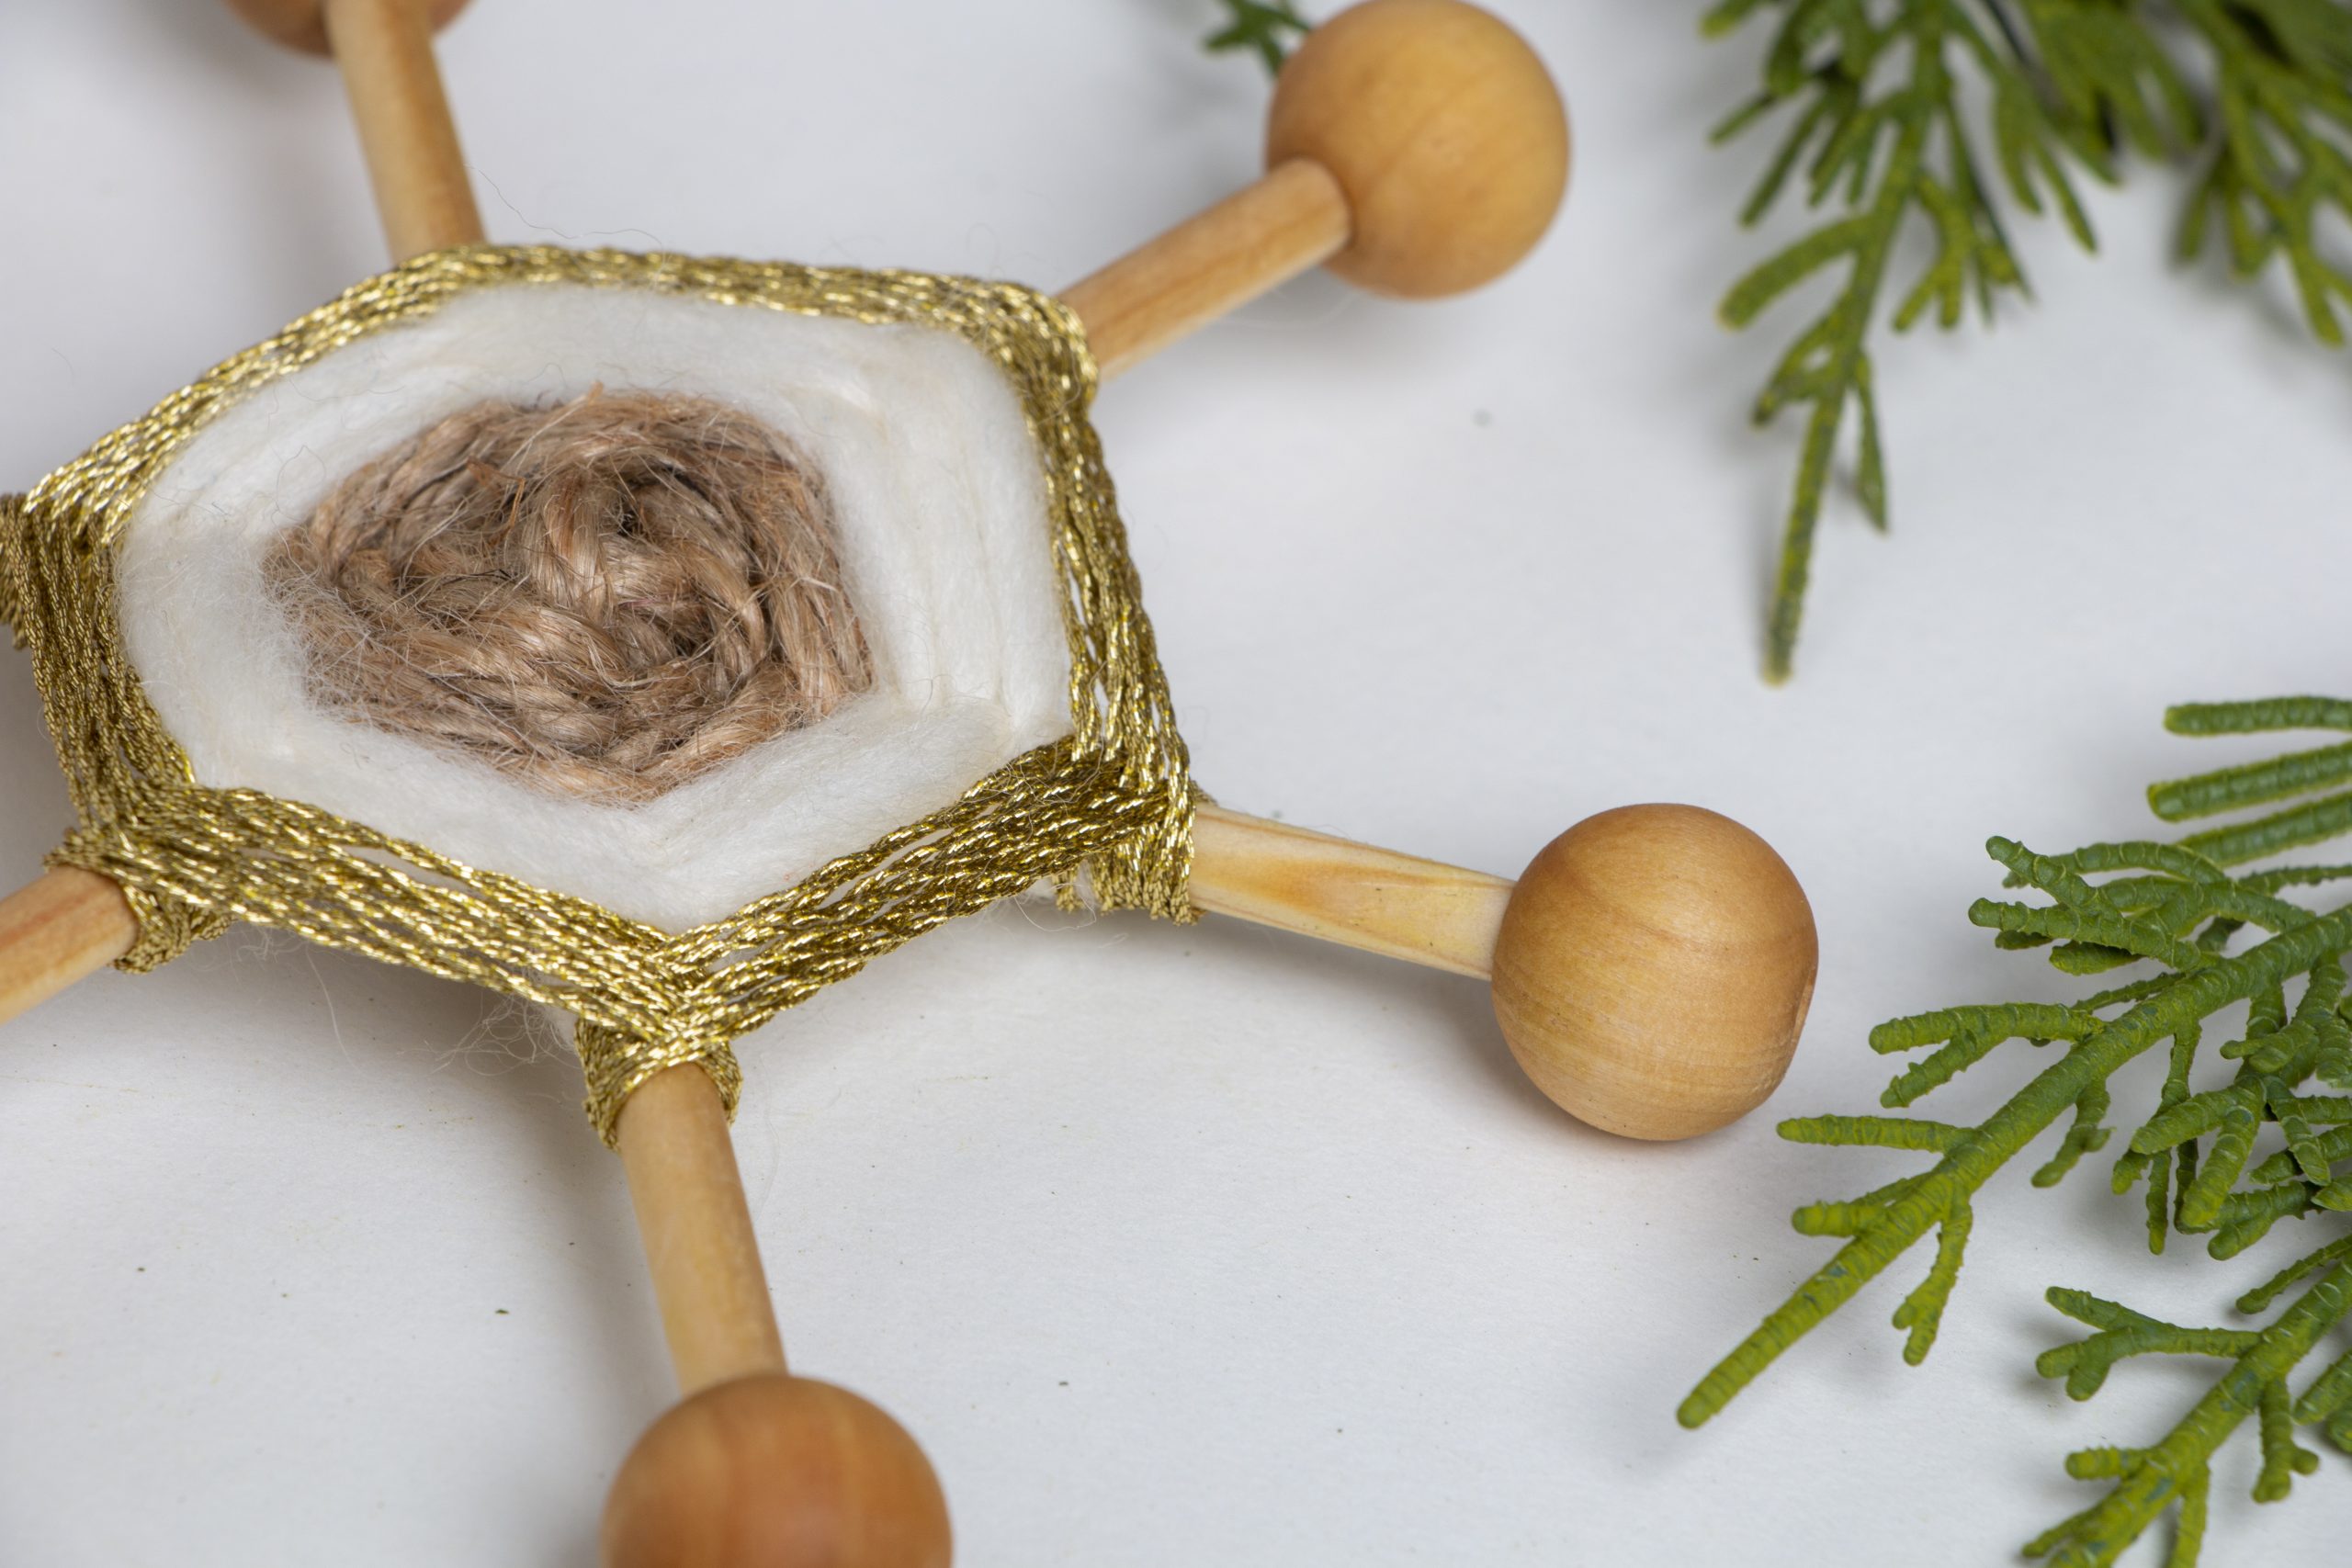
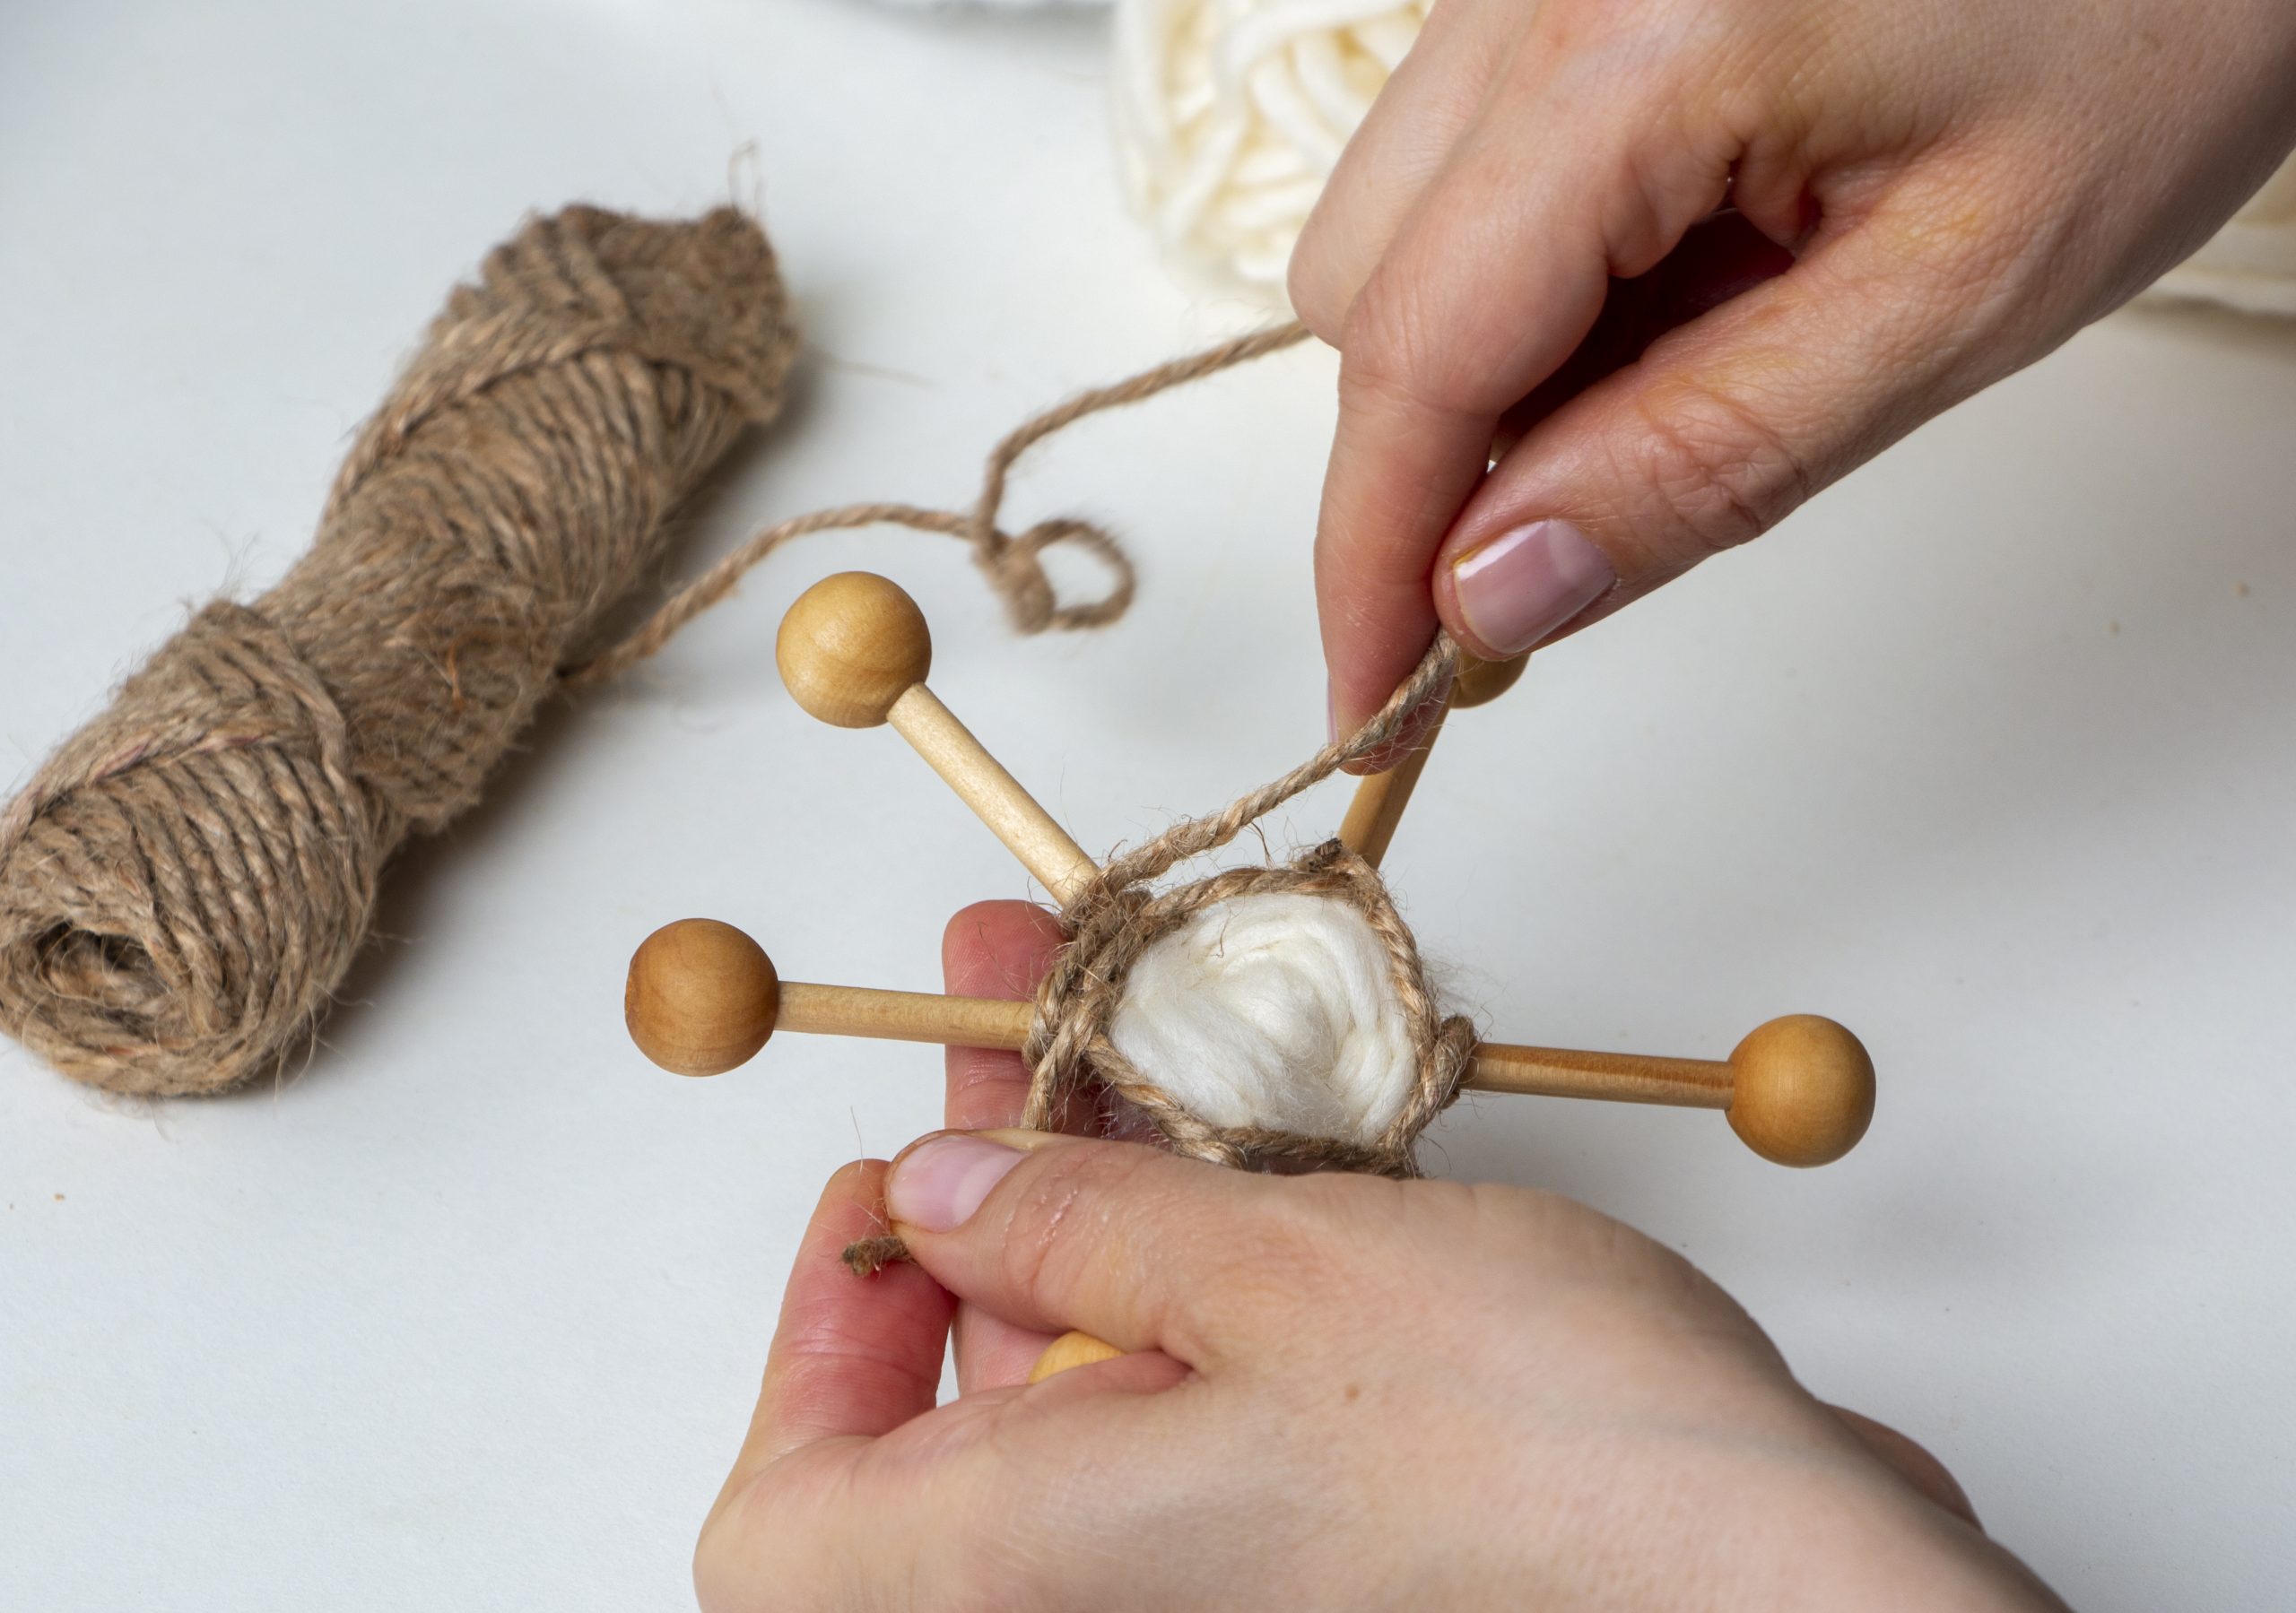
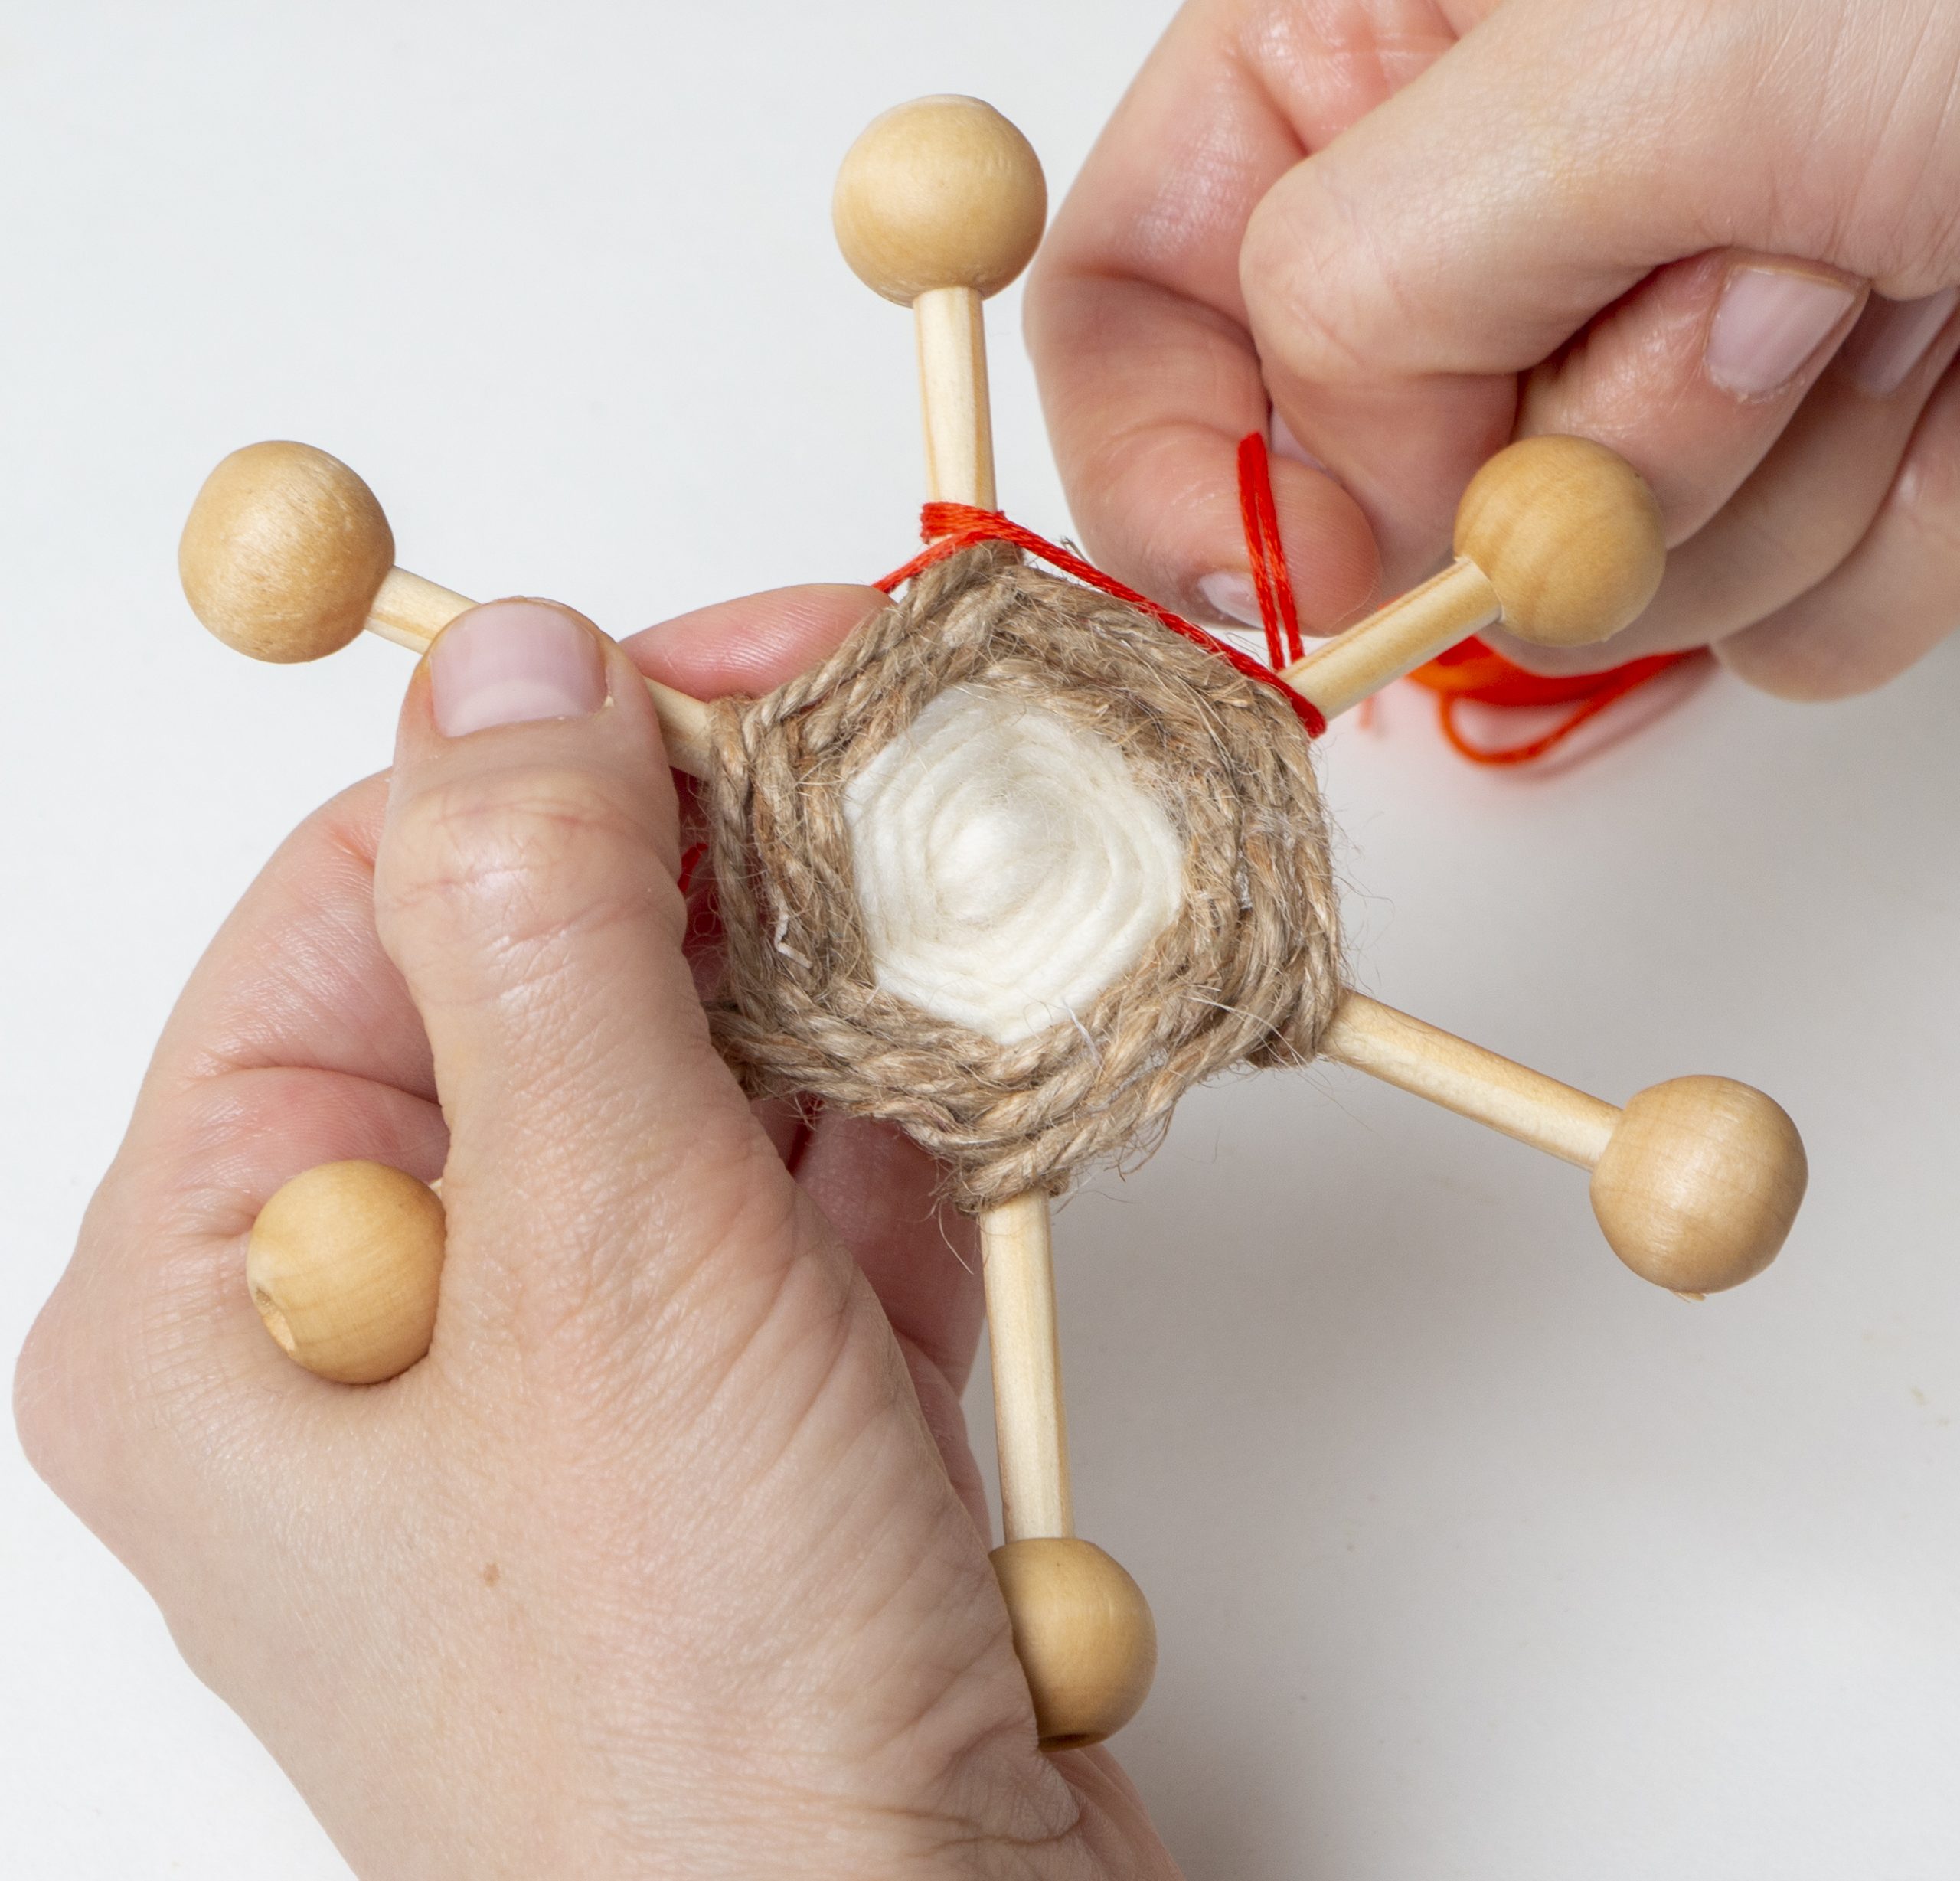
6Begin wrapping yarn. To start the wrap, loop 2x, between the rods where the pieces intersect. Leave a small tail when beginning and ending the wrap that can be glued down to secure.
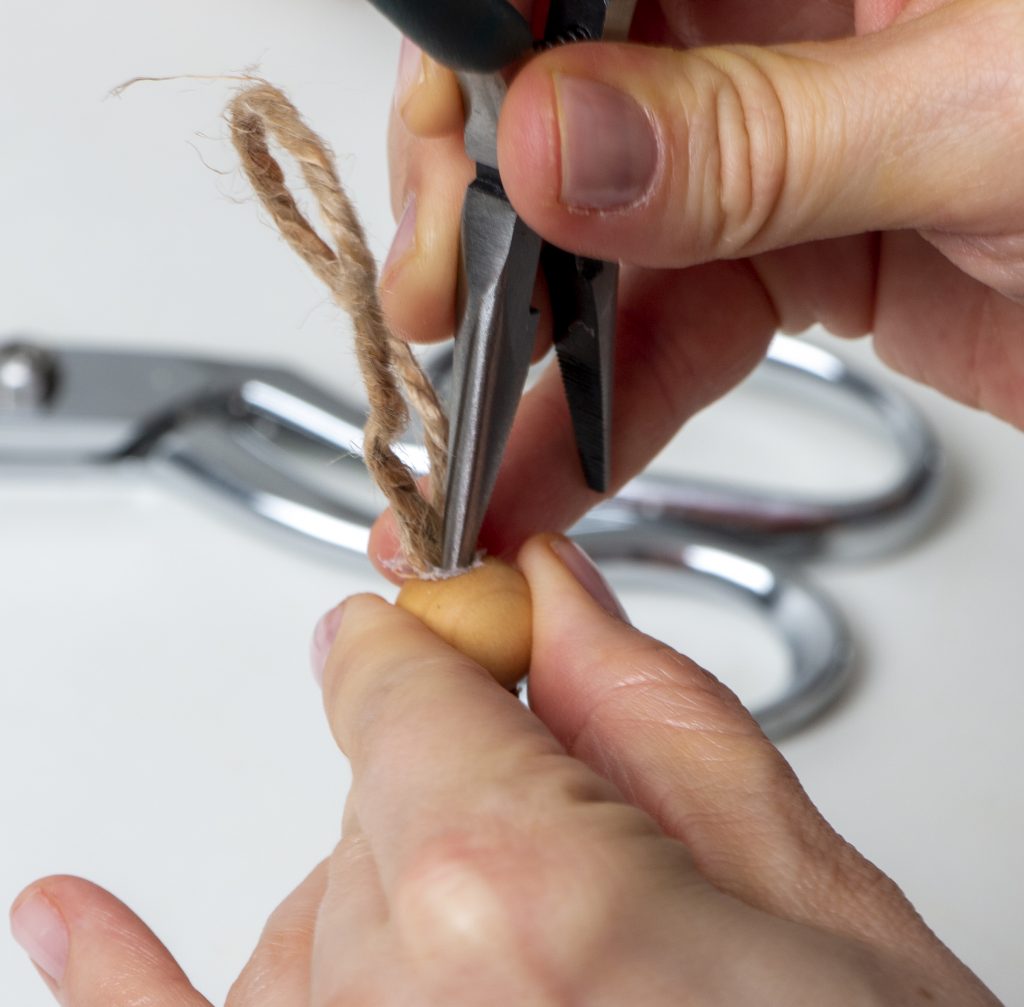
7Add loop hanger. I used a pair of scissors to carve out and enlarge the small hole in the top of one of the beads ends. I then added a dot of glue into the hole and pushed the ends of a looped piece of twine into the opening. This is a little tricky. Push as much of the twine ends as you can into the opening and allow to dry completely. Pull dry glue off to create a clean look.
And there you have it! The wrapping may require a couple of attempts but, once you get the tension and tie offs right, the process is easy to repeat. Hope you enjoyed this project! Let us know how you did in the comments below.


